Start a capture
Capturing means attaching a Whisperer to the workloads you want to watch. Nothing is captured until you do.
With the Capture Advisor (TEAM and above)
The Capture Advisor works out which workloads to attach and which ports and protocols to parse from the traffic Spider already sees between your workloads. It writes nothing until you confirm.
- Wait a minute or two after installing, so Spider can build the network usage map of your cluster.
- In the UI, select Usage, select your Controller, and hover a namespace on the map: click Set up capture.
- Follow the wizard: Introduction, Target, Plan, Probe (only when a port needs it), Apply & observe, Result.
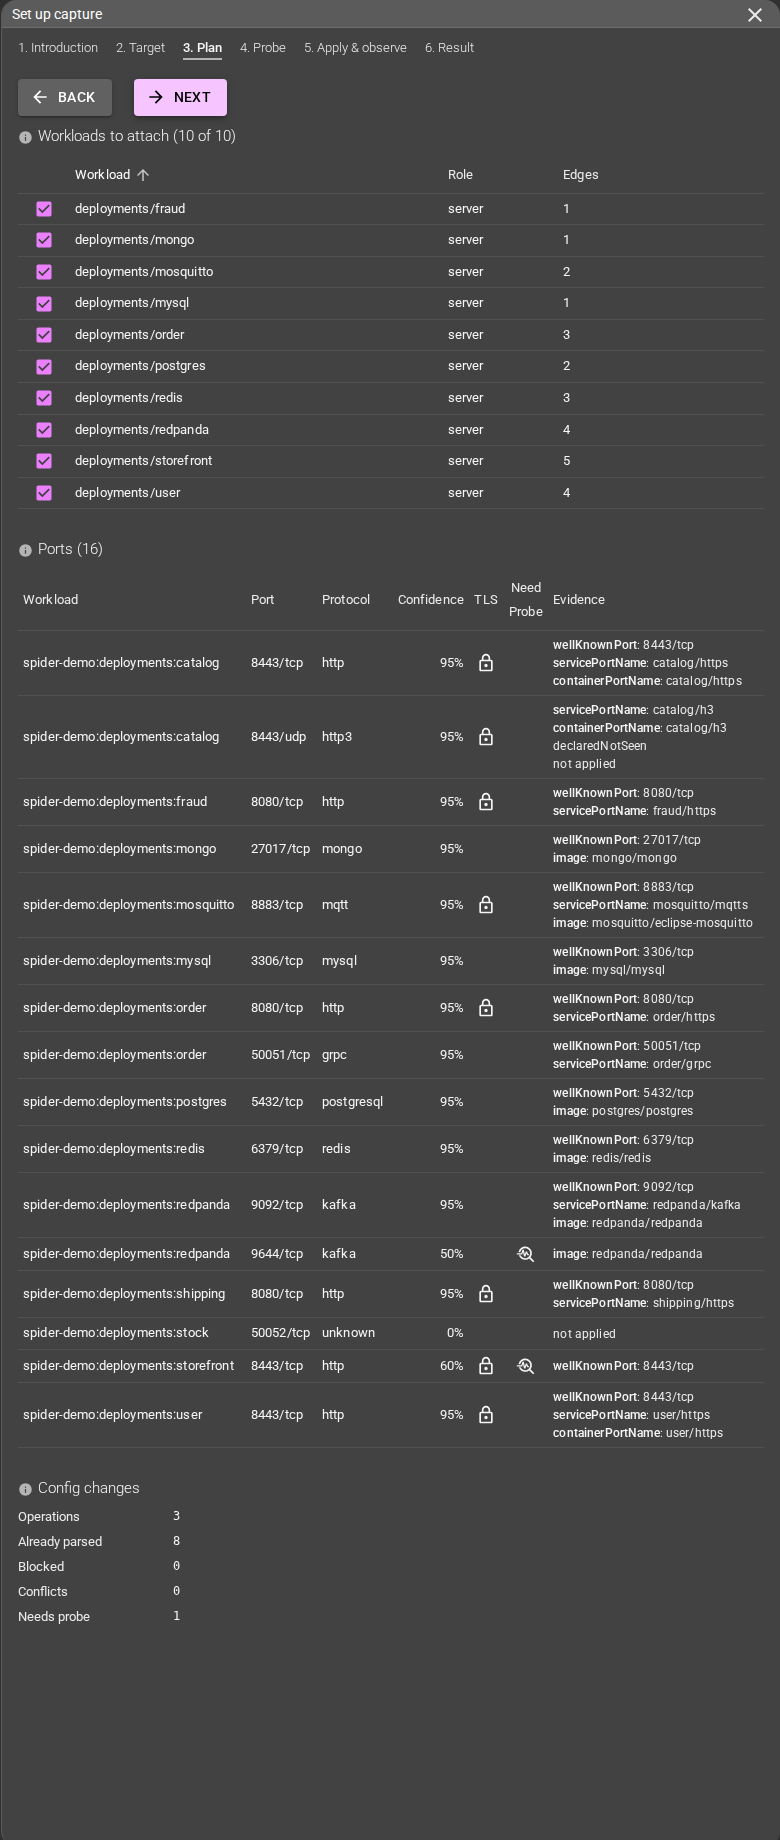
In the Target step you can pick an existing whisperer or create a new one with a name: you do not need to create it beforehand. If the result is not what you want, the Advisor can restore the previous configuration.
Details of each step are in Capture Advisor.
They only appear when all three are true:
- your licence includes the Advisor (TEAM or above; not on BASIC)
- the Advisor was deployed (
global.flips.advisor: true; the Portal wizard turns it on by default when your licence allows it) - you are not in a public-link session
If you started a trial or upgraded from BASIC, regenerate your setup.yaml with the Advisor on and run helm upgrade. See Installing the Capture Advisor.
On a BASIC licence: attach manually
- Create a Whisperer (an
INTERFACEone, real-time capture) and share it with your team (TEAM and above; on BASIC you read it directly). - Select Usage, select your Controller and open a workload on the map.
- Click Attach a Whisperer, select yours and check the Attachment link.
The step-by-step version, with screenshots, is Launch capture on a workload.
Without the Advisor, you also choose the ports and protocols to parse in the whisperer configuration. Out of the box, HTTP/1.x, HTTP/2 and HTTP/3 are decoded on the standard ports.
Next, verify that data arrives.